Tutorial : How to create a Morphing Perfect Texture UV
-
Here is a tutorial to show you how to create the two Morphing UV texture needed for the Morphing Pefect Texture Pack Node
IMPORTANT: Before we start, to be able to achieve this texture, you must need Adobe Photoshop.
We will use the Liquify tool from Adobe Photoshop, it is possible that other software uses this technique, but we will use Photoshop for this tutorial, to illustrate and show you how it works.
Note: There is currently no Vetasoft tool to make this texture, the tool Liquify Photoshop is very powerful. The approach may seem long but once well mastered, the result is up to our expectations.
Please enjoy this tutorial 🙂
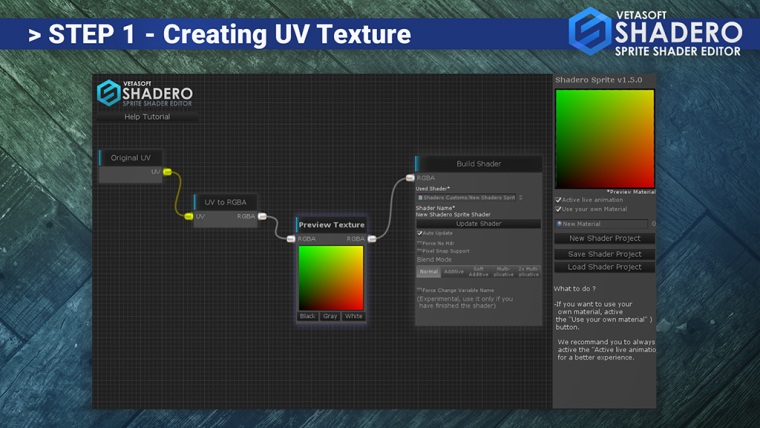
STEP 1: THE CREATION OF THE UV TEXTURE SHADER
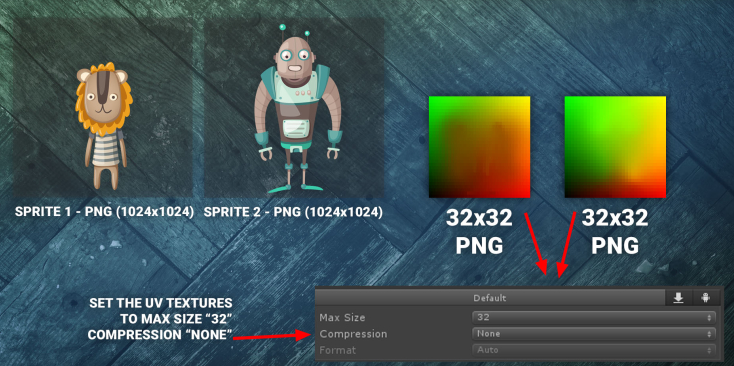
To use the Note Sprite Sheet UV Anim Pack, you will need a special UV texture. An atlas texture with the color green, yellow and red. It's the visual representation of the UV coordinates of your shader.
Red represents X, and green represents Y. (Blue is not used)But first, we need a Standard UV Texture to work with Photoshop.
You can generate a Standard UV texture with Shadero Sprite, the approach is very simple. Create the nodes like this (see Step 1 image)
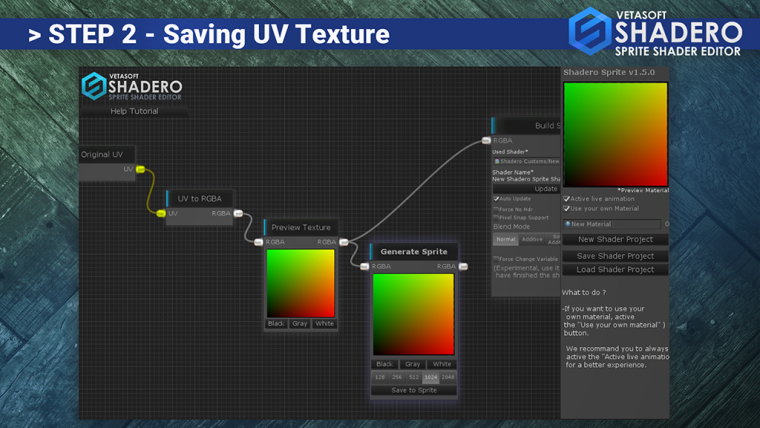
STEP 2: SAVE THE UV TEXTURE
Connect Generate Sprite with the Texture preview as on the image, select 1024x1024 and save the file in PNG.
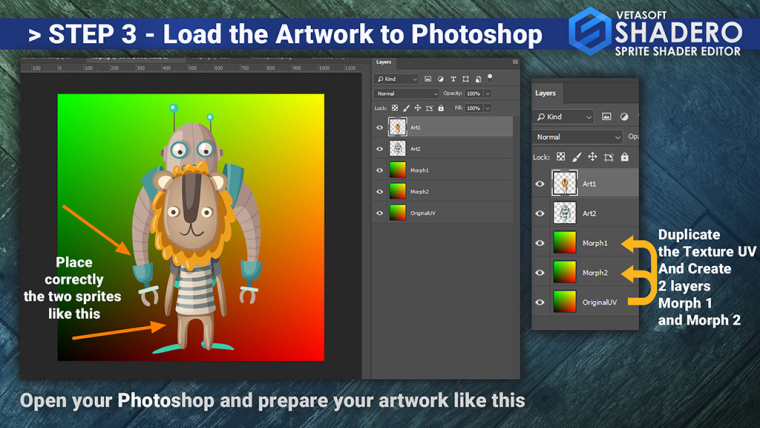
STEP 3: PREPARE PHOTOSHOP
Load the UV texture created with Shadero Sprite and add a new layer to your image.
Note: Once your image is well placed on the layer, it can not be moved.
Tip: Leave a few empty spaces between the image, reduce it if necessary. Remember that you will distort the image, so let some free empty space.
The image we use is 1024x1024 but you can work with a size like 512x512, 2048x2048 or even 4096x4096.
Duplicate 2 times the UV Texture layer (see Image Step 3)
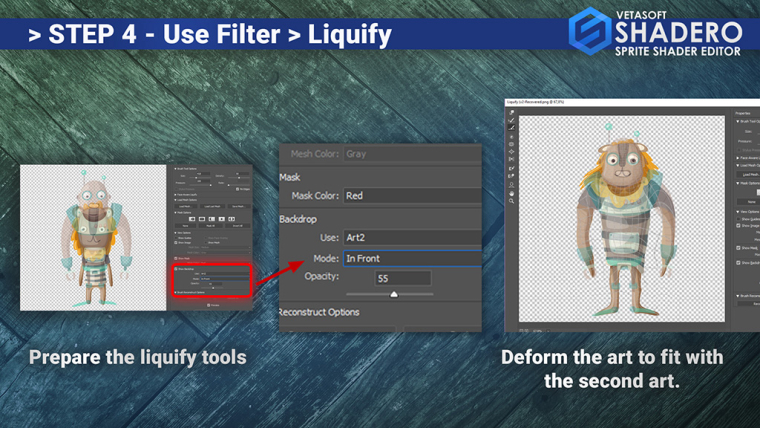
STEP 4: Use The Filter Liquify Tools
Load the Liquify tools on Photoshop ( Filters > Liquify ), afterthat set the Backdrop to see only the second art.
Than, deform the first art to fit correctly with the second art. In our example, the arm fit with the second arm, etc.
Take your time, use all the tools available on the Liquify tools, this part is really important.
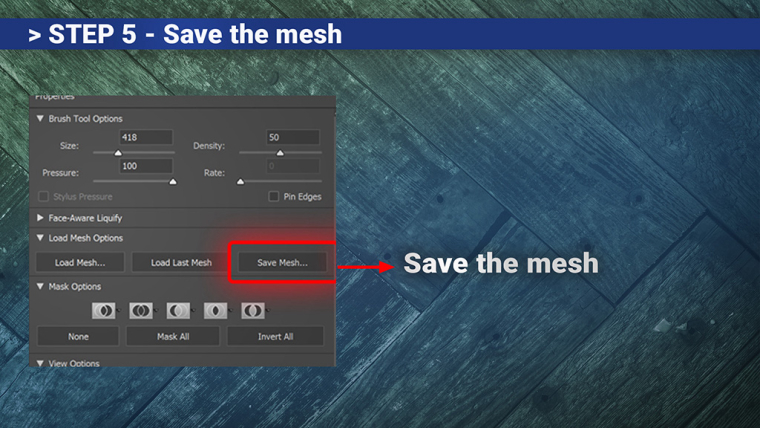
STEP 5: SAVE THE MORPH
Once your deformation is over, save the Mesh (The Liquify tools uses a mesh system), click on Load Mesh Options, and "Save Mesh".
Note: Do not click OK after each deformation, once you have deform your image, save the mesh, reset the deformation, click Restore All, and repeat as many times as you wish
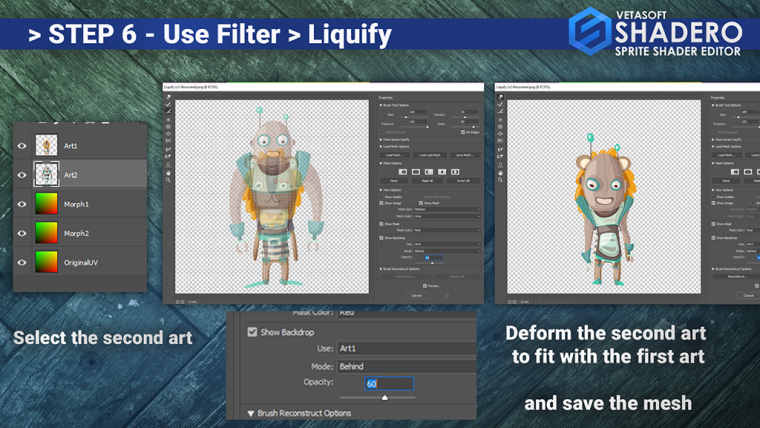
STEP 6: Deform the second art
Select the second art layer, and open the Liquify tools. Like the Step 4, deform the 2nd Art to fit with the 1st Art.
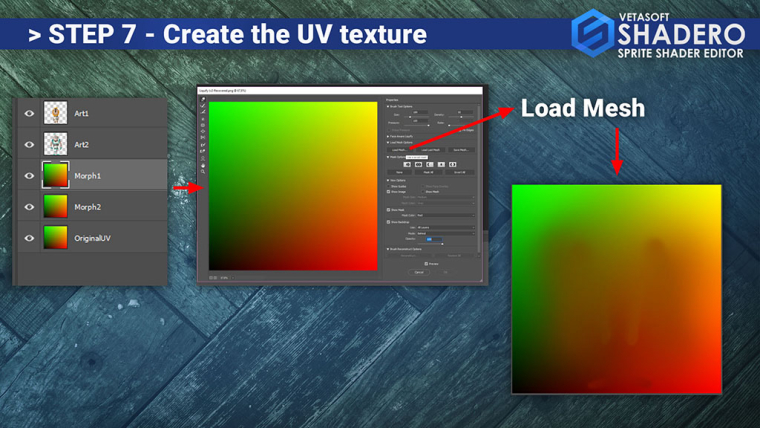
STEP # 7: DEFORM UV TEXTURES
Select the first UV Texture layer, once selected, click on Filter > Liquify and load the first saved mesh with "Load Mesh"Important: D'not forget to activate "Pin Edges" to keep the edges.
The result should be like in the picture (Step 7)
Then click on OK to validate the deformation.
Repeat this step with the second UV Texture Layer and open the second saved mesh.
STEP # 8: CREATE FINAL UV SHADERO TEXTURE.
Once everything is deformed, resize the image to 32x32 and select "Nearest Neighbor (hard edges)"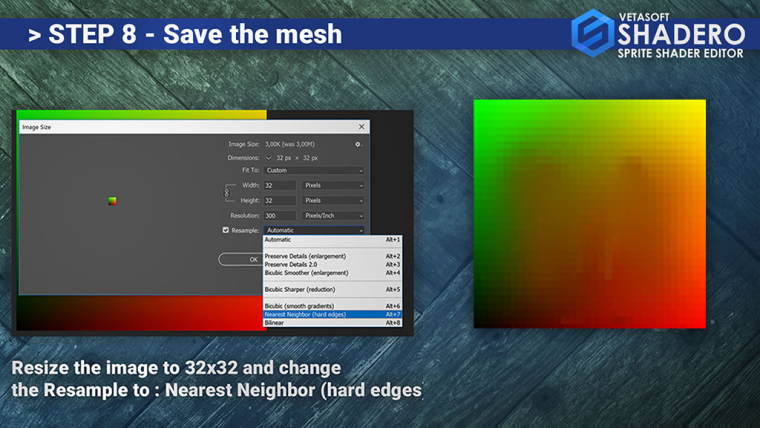
STEP # 9: SAVE THE FINAL FILES.
Your artworks (sprites) must be in high resolution
The 2 generates UV Texture must be set to 32x32 and, when you import them to Unity, the UV Texture must be set to compression "None" (to avoid the strange glitch)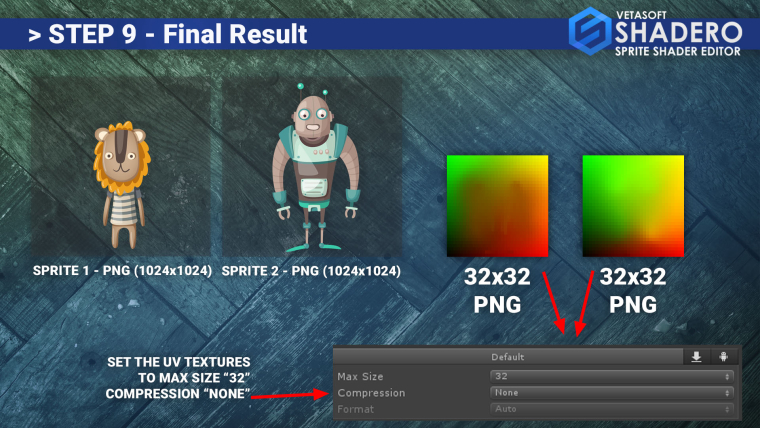
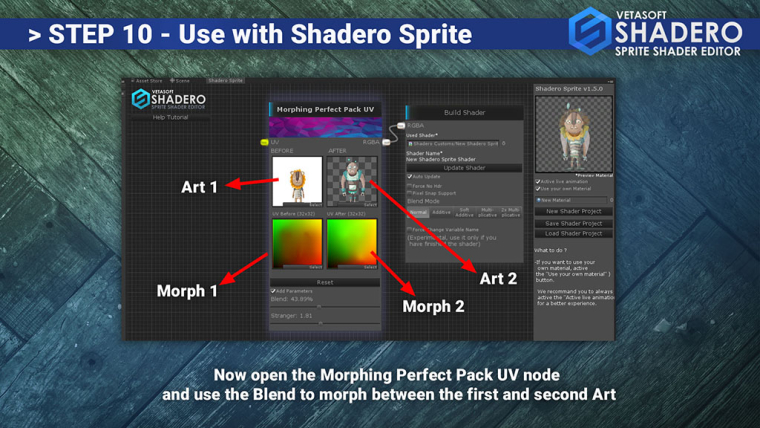
STEP # 10: USING WITH SHADERO SPRITE
When you import the texture to Unity, you must imperatively set the compression to "none".
Since the texture is small and each pixel is important, it must not be compressed.
In contrast, the size of the texture is small, so it does not take much space.
If you have any questions, do not hesitate, this forum is made for that.
Best Regards,
The Vetasoft team