Tutorial : How to create a Shader Morph Texture UV for the node Sprite Sheet UV Anim Pack
-
Here is a tutorial to show you how to create a UV Morph texture with the UV Sprite Sheet Anim Pack node from Shadero Sprite 1.5.0
IMPORTANT: Before we start, to be able to achieve this texture, you must need Adobe Photoshop.
We will use the Liquify tool from Adobe Photoshop, it is possible that other software uses this technique, but we will use Photoshop for this tutorial, to illustrate and show you how it works.
Note: There is currently no Vetasoft tool to make this texture, the tool Liquify Photoshop is very powerful. The approach may seem long but once well mastered, the result is up to our expectations.
Please enjoy this tutorial :)
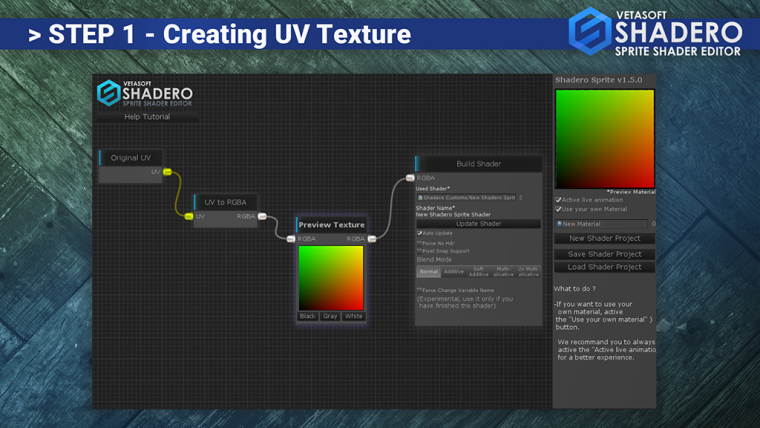
Step 1: The creation of the UV Texture Shader
To use the Note Sprite Sheet UV Anim Pack, you will need a special UV texture. An atlas texture with the color green, yellow and red. It's the visual representation of the UV coordinates of your shader.
Red represents X, and green represents Y. (Blue is not used)But first, we need a Standard UV Texture to work with Photoshop.
You can generate a Standard UV texture with Shadero Sprite, the approach is very simple. Create the nodes like this (see Step 1 image)
Step 2: Save the UV Texture
Connect Generate Sprite with the Texture preview as on the image, select 1024x1024 and save the file in PNG.

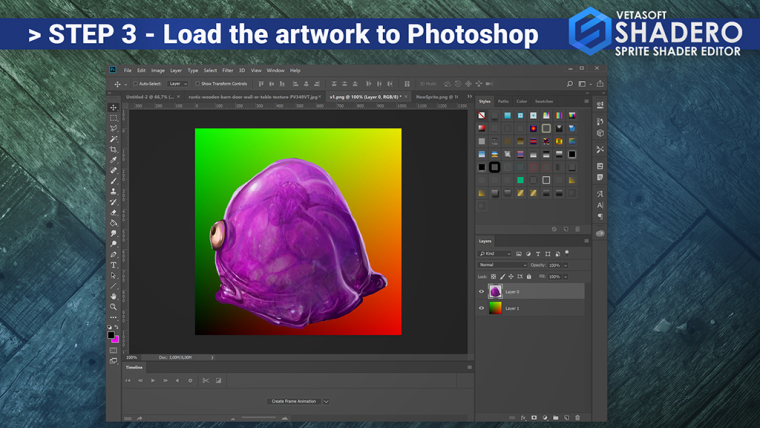
Step 3: Prepare Photoshop
Load the UV texture created with Shadero Sprite and add a new layer to your image.
Note: Once your image is well placed on the layer, it can not be moved.
Tip: Leave a few empty spaces between the image, reduce it if necessary. Remember that you will distort the image, so let some free empty space.
The image we use is 1024x1024 but you can work with a size like 512x512, 2048x2048 or even 4096x4096.
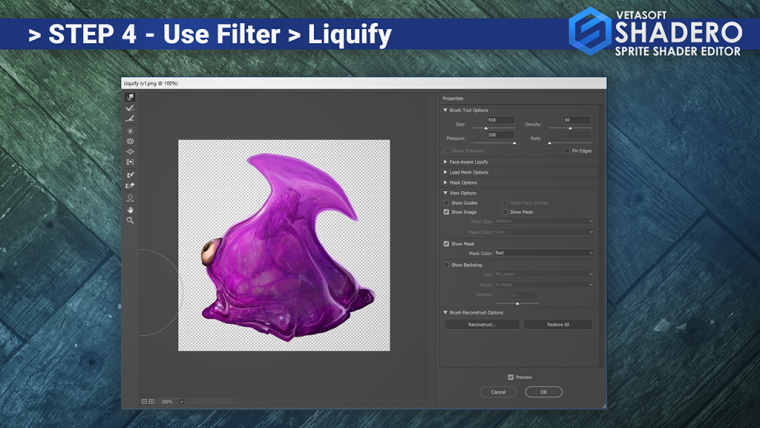
Step 4: Use the Liquify filter
In the Filter menu of Photoshop select Liquify, now distort your image as you please, use the power of Liquify.
Note : If you are not familiar with the Liquify tool, there is a lot of tutorial on Youtube, I advise you to see them, even if the tool is quite simple to understand.
Note : you can directly test your deformation with the Reconstruct option.
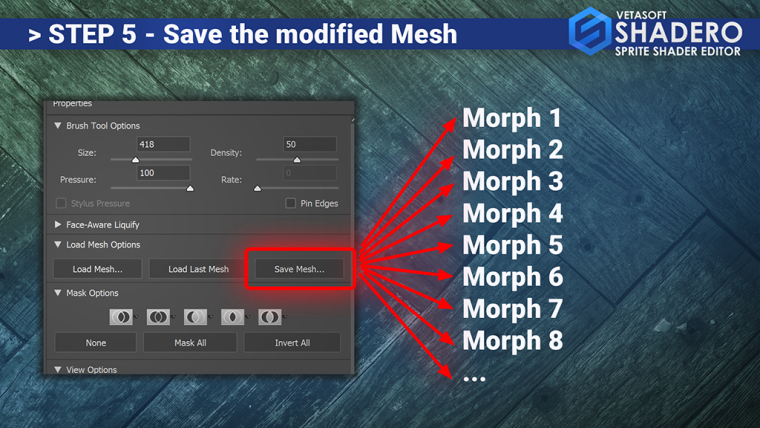
Step 5: Save the morph
Once your deformation is complete, save the Mesh (The Liquify tools uses a mesh system), click on Load Mesh Options, and "Save Mesh".
Create as much distortion as you desire.
Note: Do not click OK after each deformation, once you have deform your image, save the mesh, reset the deformation, click Restore All, and repeat as many times as you wish
Step # 6: Prepare Layers
Once you have prepared the deformations, duplicate as many times as you have created deformations with the UV Texture create with Shadero Sprite (see Step 6 picture)

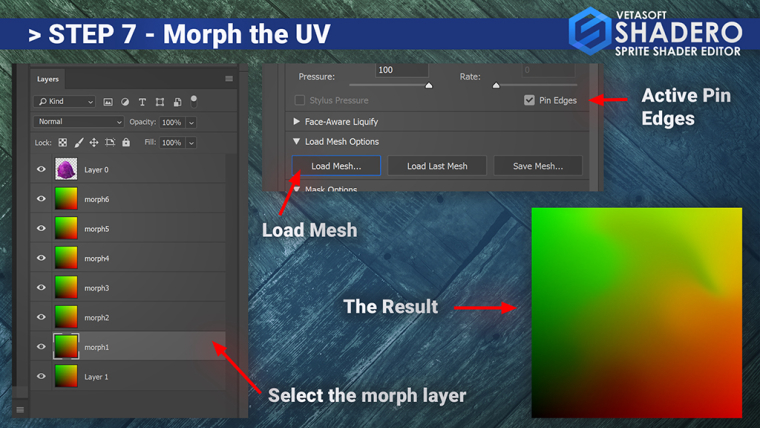
Step # 7: Deform UV Textures
Selecting the first layer (see Step 7 image), once selected, click on Filter > Liquify again and load the first one with Load Mesh.
Important: Do not forget to activate "Pin Edges"
The result should be like in the picture (Step 7)Then click on OK to validate the deformation.
Repeat as many times as you have deformation on each layer.
Note: It seems long, but it's a necessary step, do not forget that a video game is not done in a snap and this technique requires a lot of preparation, be patient :)
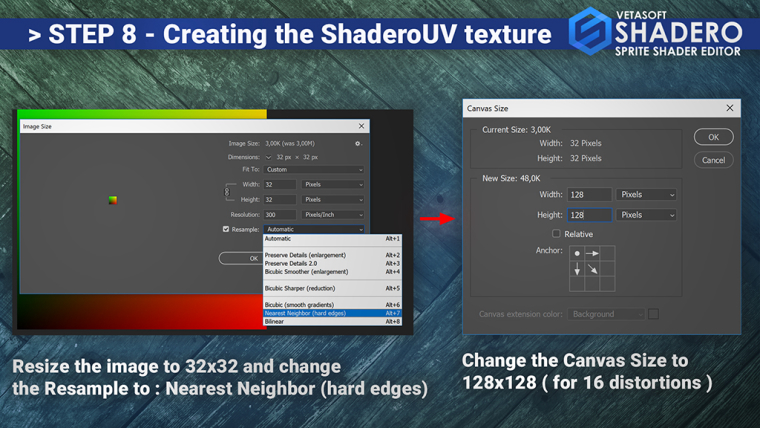
Step # 8: The creation of the final UV Shadero texture.
Once everything is deformed, resize the image to 32x32 and select "Nearest Neighbor (hard edges)"
Then change the canvas with the size 128x128 and place the anchor at the top left, ( See Step 8 Image )
Note: it looks very small, but it's the magic of this technique, a texture of 128x128 allows to modify 16 images without loss of precision.
You can use a minimum size of 64x64, which corresponds to 4 deformations
64x64 = 4 Deformations
128x128 = 16 Deformations
256x256 = 64 Deformations
etc ...Note: As long as each UV deformation has a size of 32x32
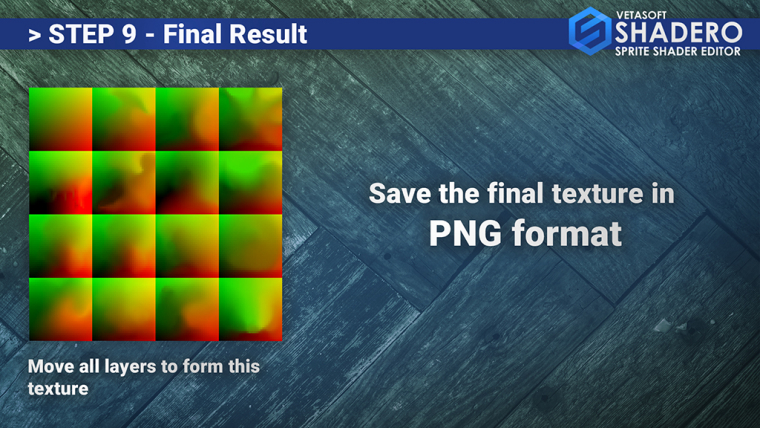
Step # 9: Save Texture
Move the layers as in the picture (Step 9) to have a Sprite Sheet, save in PNG
Note: the format must be imperatively a 24-bit PNG
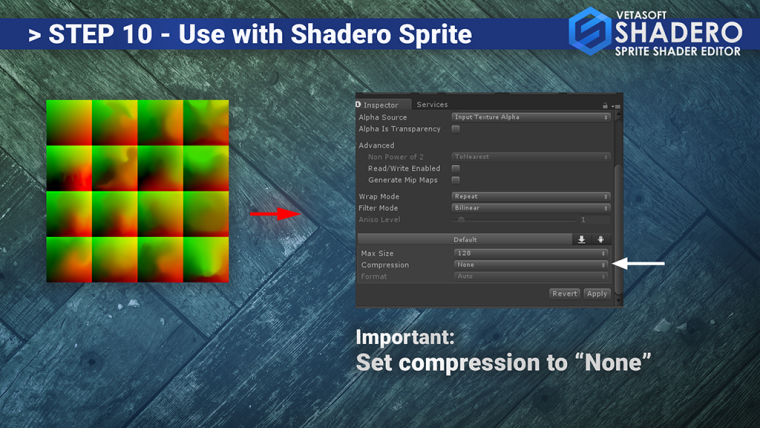
Step # 10: Using with Shadero Sprite
When you import the texture to Unity, you must imperatively set the compression to "none".
Since the texture is small and each pixel is important, it must not be compressed.
Step number 11: It's ready
Load SpriteSheet UV Anim Pack as on the image (Step 11)
Size: set the number of images to use the value 4 (4 x 4)
Frame: is the first deformation
Frame 2: is the second deformation
Blend: makes the transition from the first to the second deformation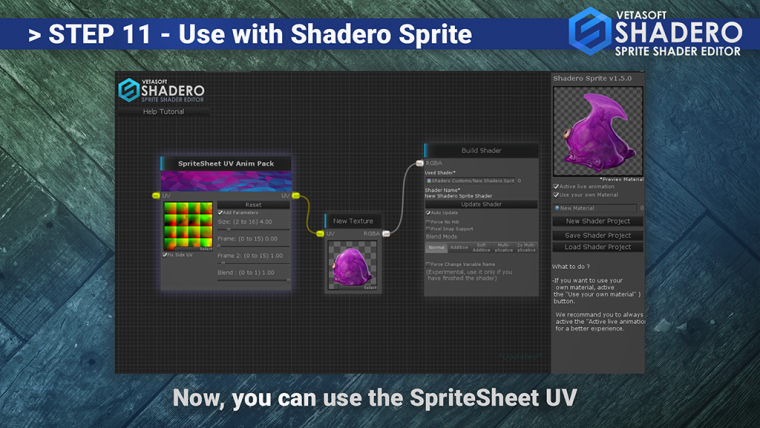
Now, you can distort any deformation between it, the result is surprising.
If you have any questions, do not hesitate, this forum is made for that.
Best Regards,
The Vetasoft team